
Welcome to the Dasha.AI and Zapier Integration Manual. This guide is designed to provide a seamless step-by-step process for integrating Dasha.AI, a leading conversational AI platform, with Zapier, enabling you to automate workflows and enhance your business processes. Whether you are looking to streamline customer interactions or automate complex tasks, this integration opens up a world of possibilities.
Prerequisites
- A Zapier account is required. If you don't have one, sign up at Zapier and follow the easy setup instructions.
Setting up Your Dasha Account
- Visit Dasha Playground and click 'Sign Up'.
- Follow the on-screen instructions to create your account.
Creating Your First Zap with Dasha.AI
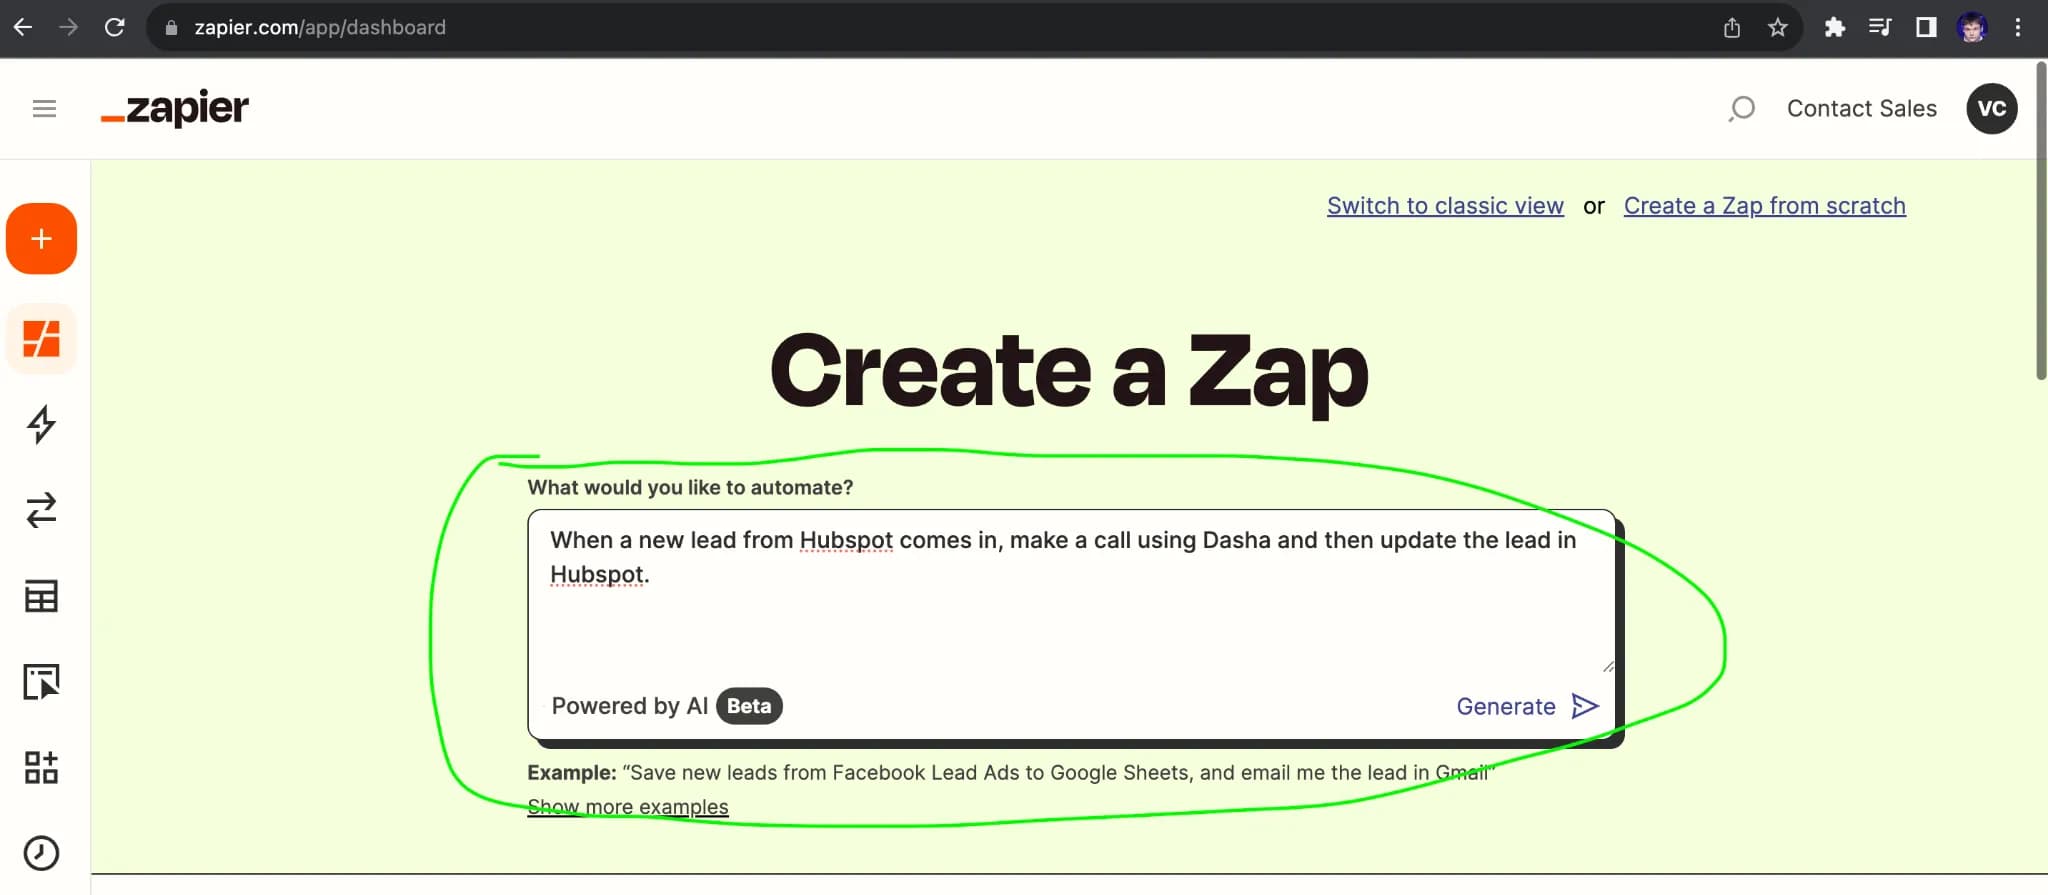
- Navigate to the Zapier Dashboard
- In the "What would you like to automate?" field, describe your process, like "When a new Hubspot lead comes in, make a Dasha call and update the lead in Hubspot." Then click “Generate”.
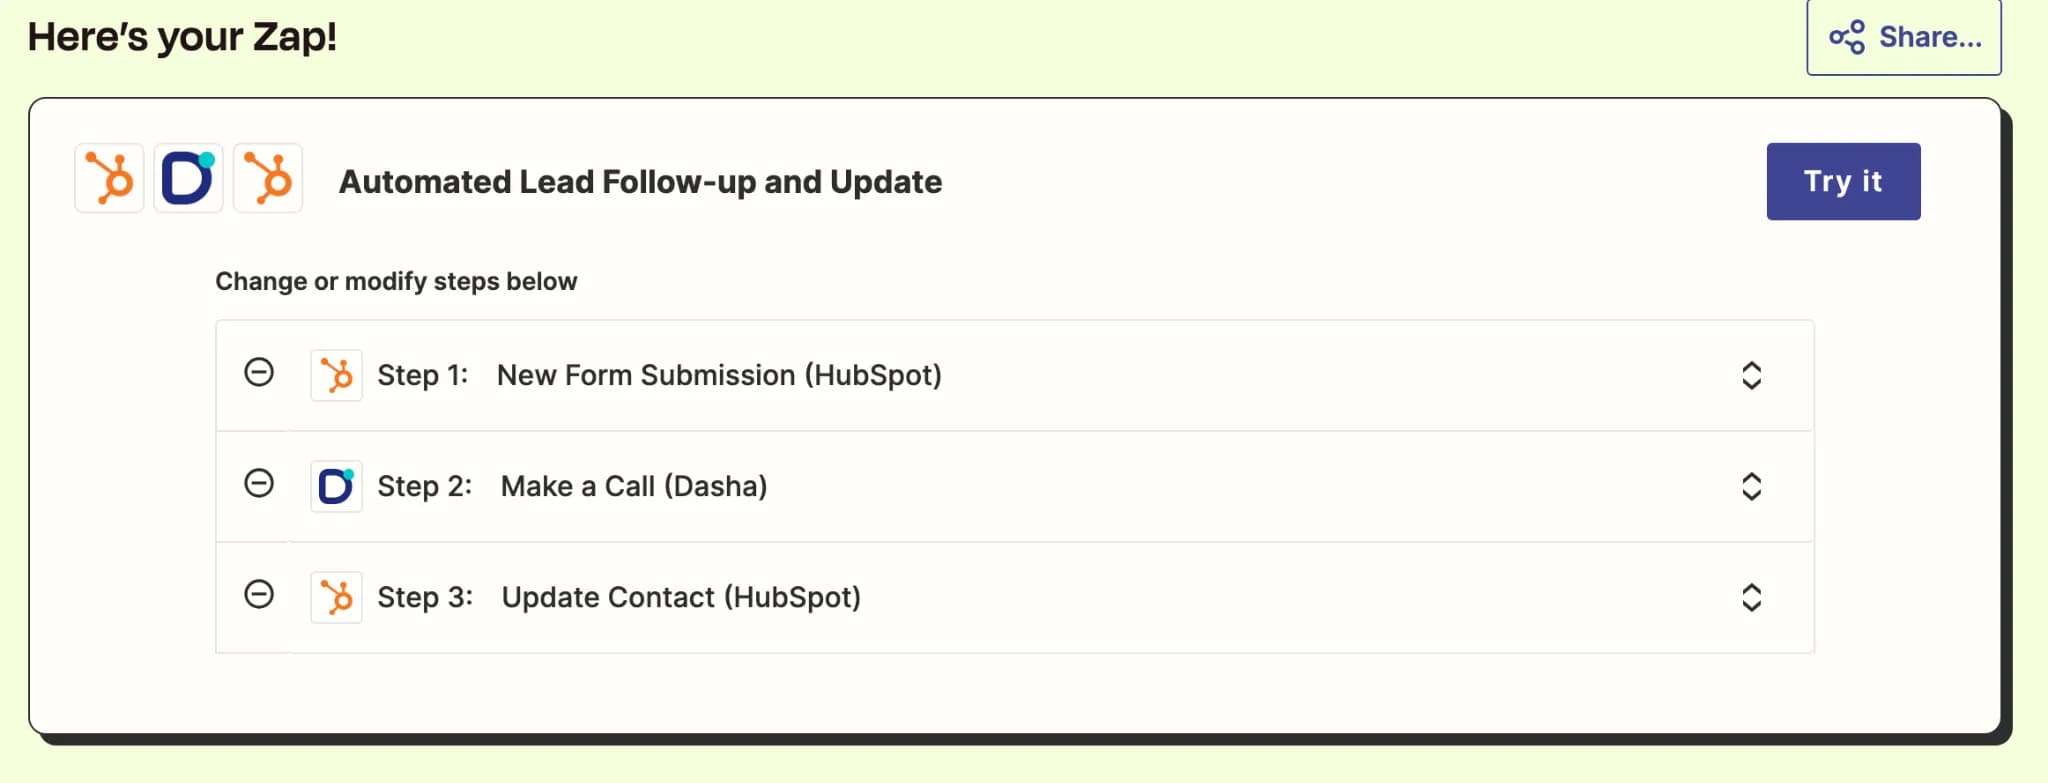
Drafting Your Zap:
- Zapier will create a draft Zap. Click 'Try it'.
- Review the workflow to ensure it meets your requirements.
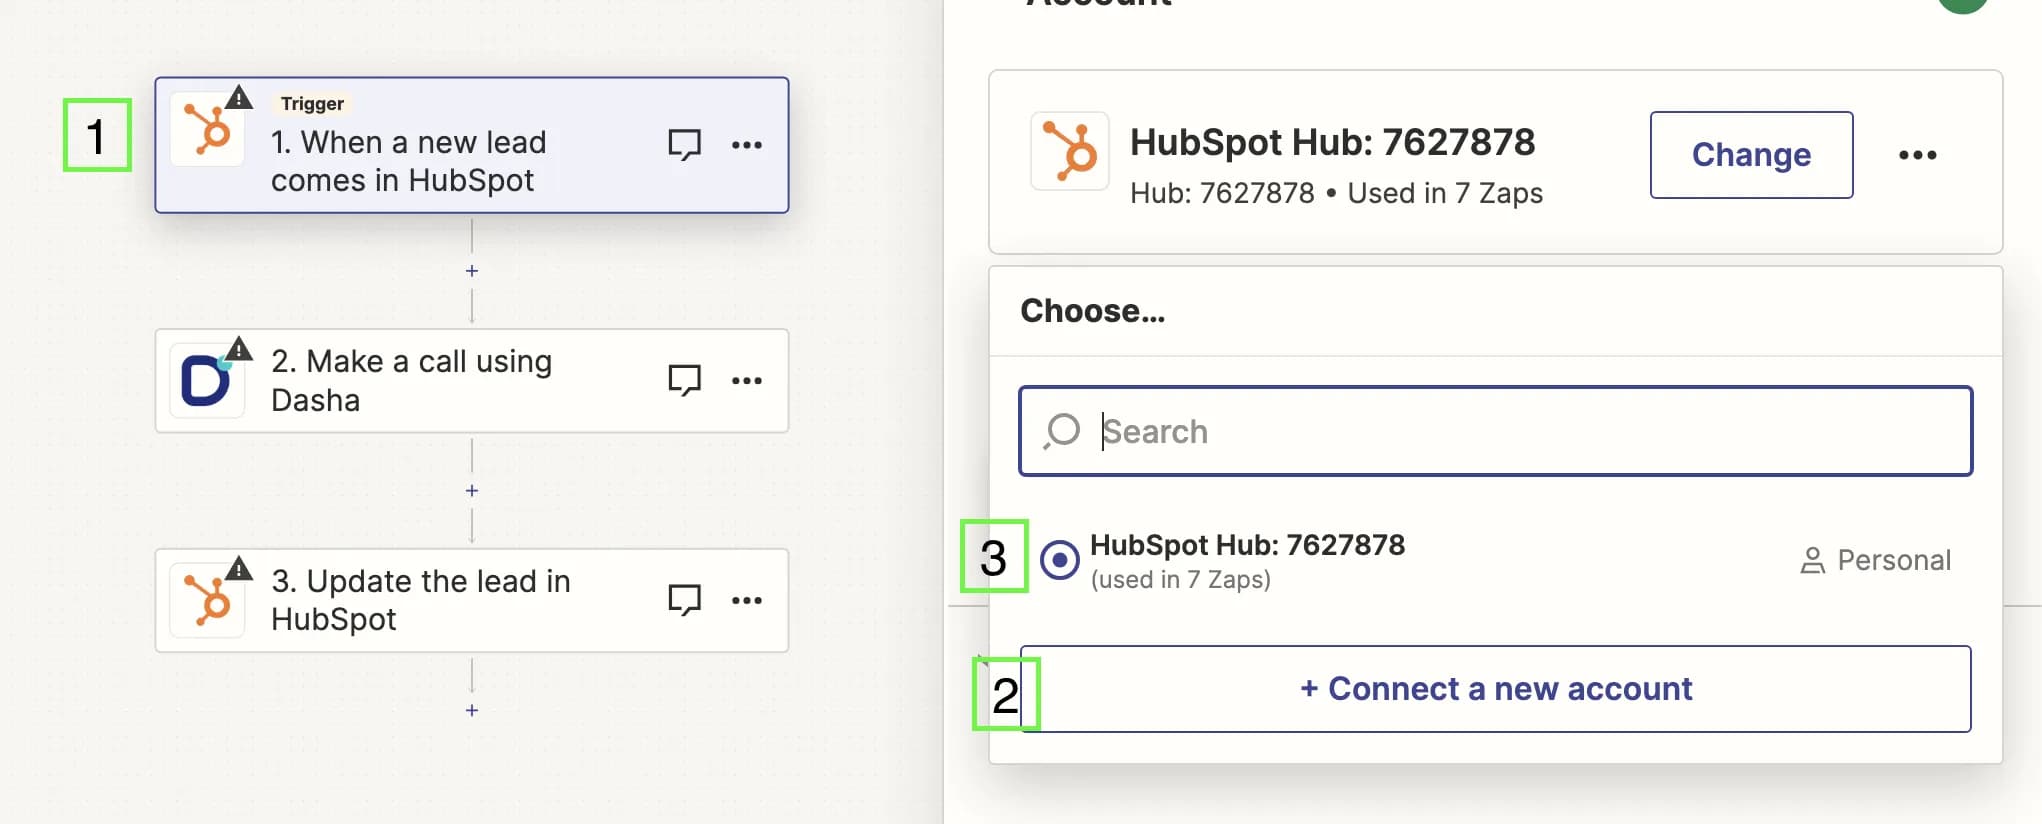
Setting Up the Trigger:
- Click on the first step to set up the trigger.
- Connect a new account (your CRM, database, etc.) and follow the prompts to integrate it with Dasha.
- After connecting, select this account for your Zap.
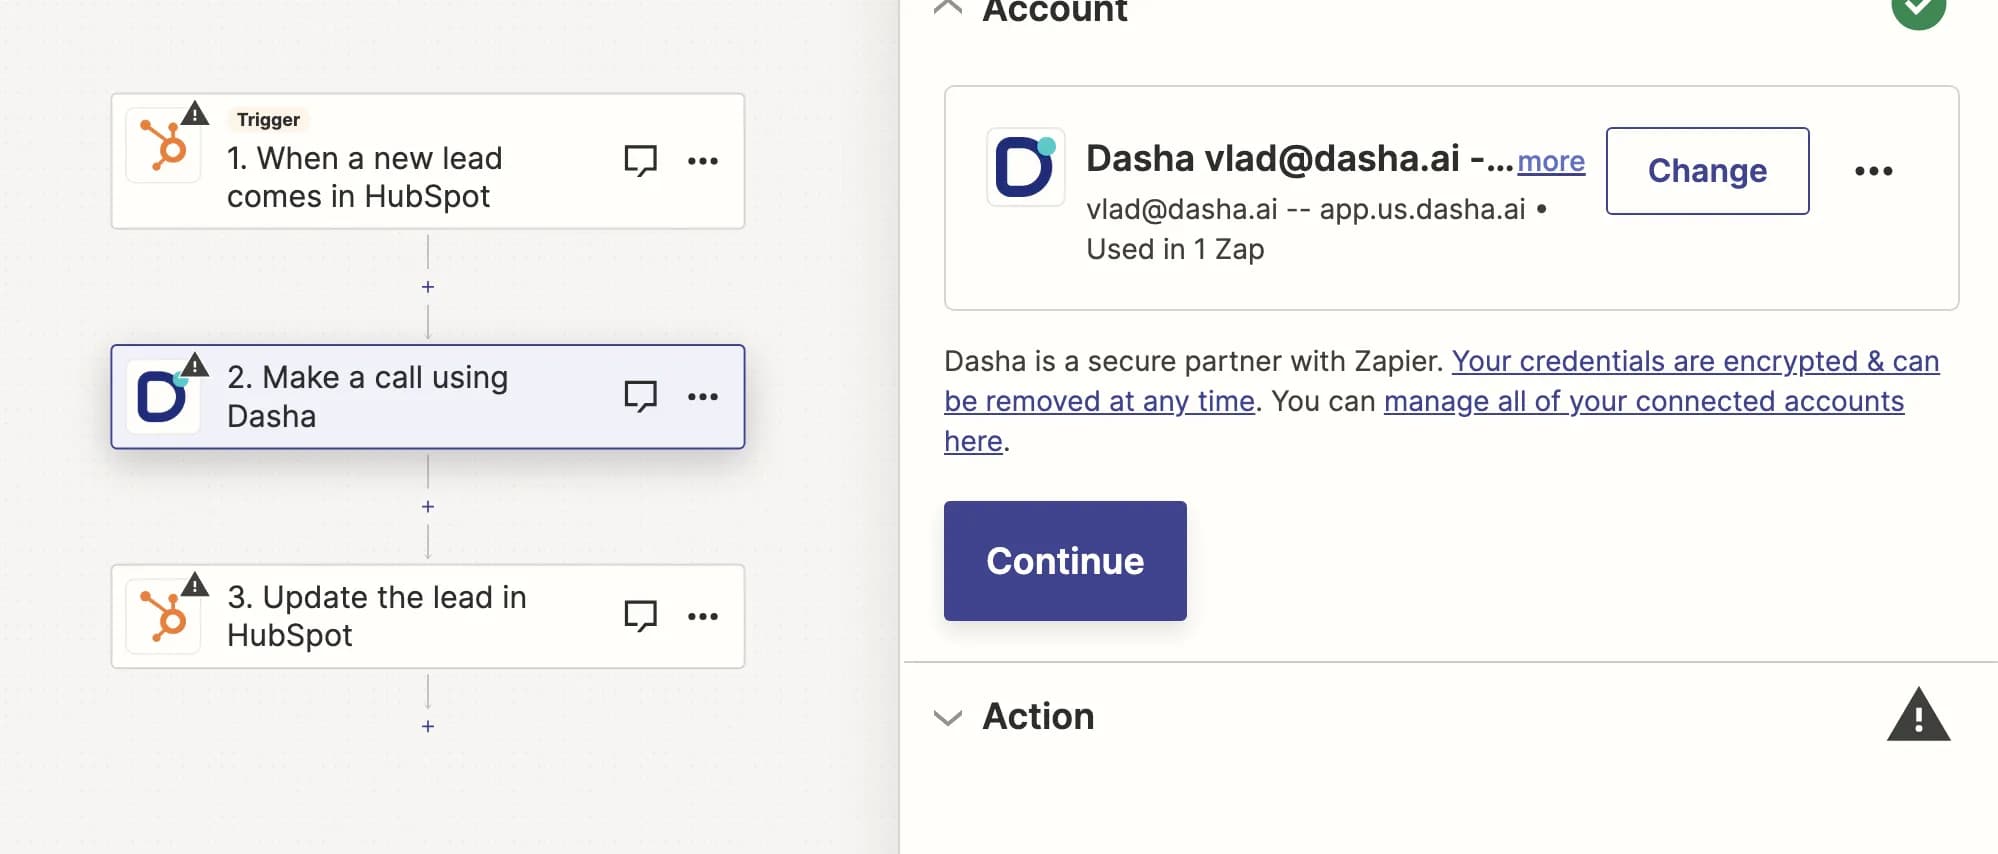
Connecting Dasha to Zapier:
- Click on “Make a call (Dasha)” and choose “Connect a new account”.
- Obtain your API key from Dasha API Key and copy it.
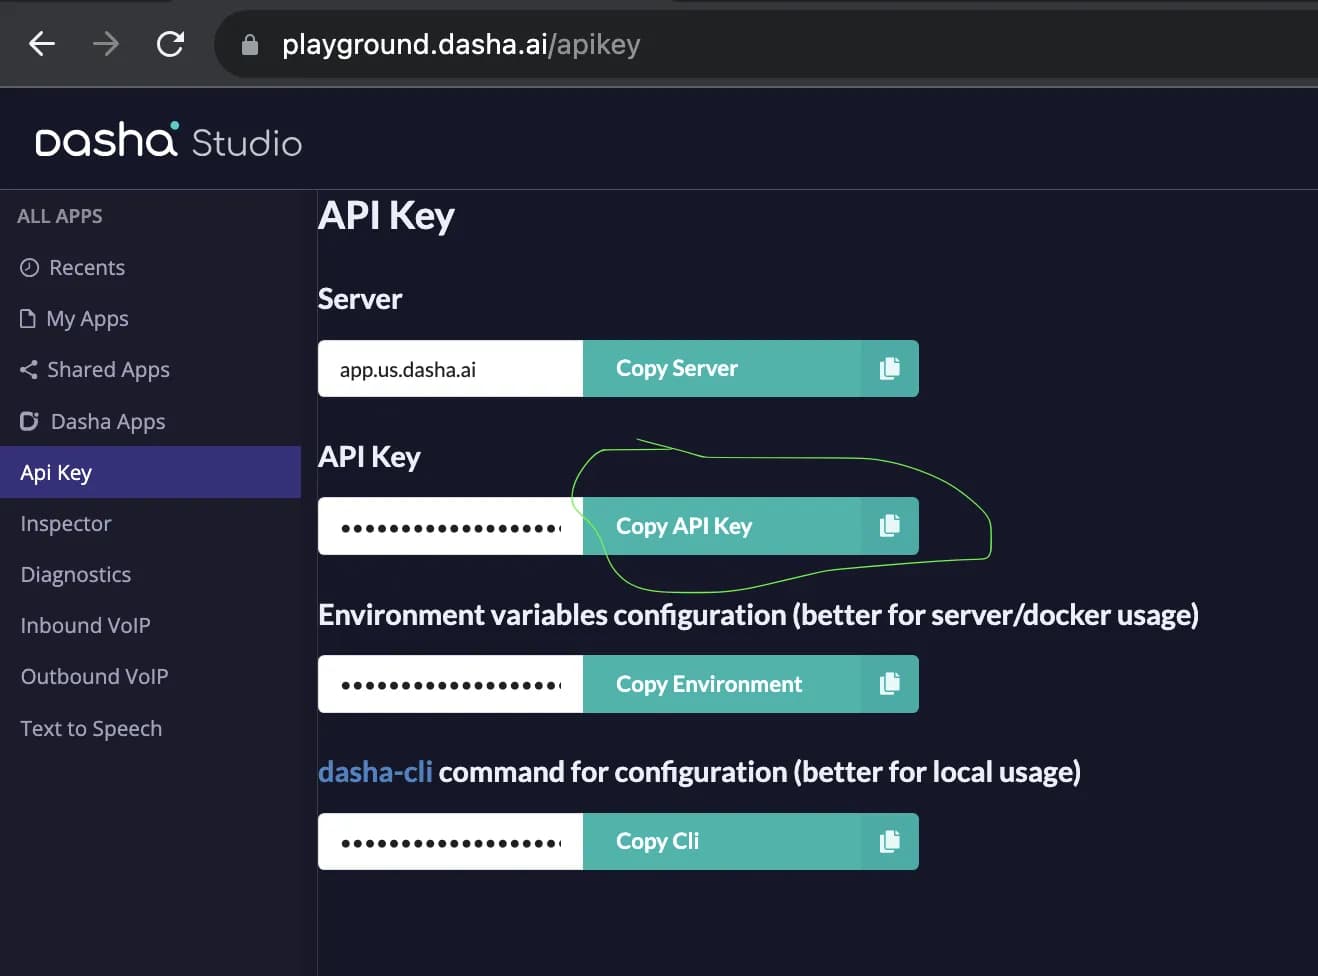
- In the new Zapier window, enter “app.us.dasha.ai” as the server and paste your API key. Click “Yes, continue to Dasha”.
- Click “Continue” after connecting your Dasha account.
Setting Up Telephony and Bot:
- Visit Dasha Outbound VoIP and click “Add configuration”.
- Enter your VoIP credentials and click “Add”.

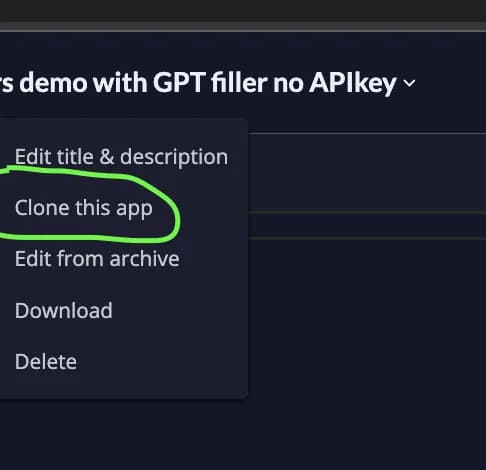
- Create your Dasha bot using the Template Bot. Clone the app to your workspace by putting the mouse over the bot name and clicking “Clone this app”.
Configuring Your Dasha Bot:
- In your Dasha workspace, open the app.dashaapp file.
- Rename your bot by editing the "name" field.
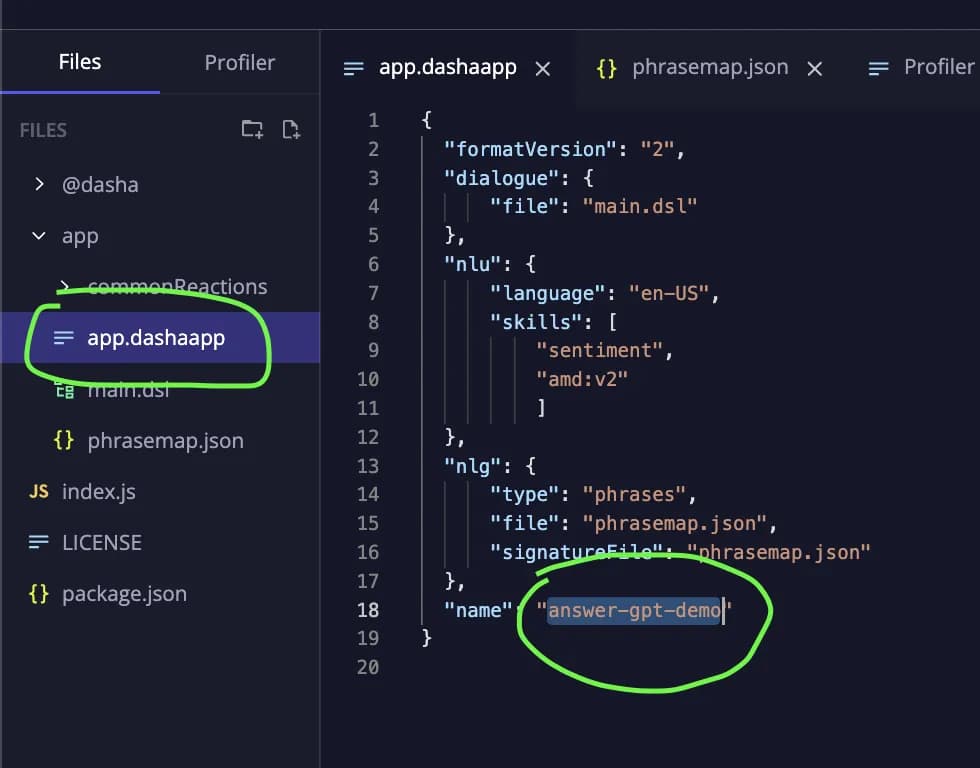
- Then, proceed to the main.dsl file to customize your bot. Here, you can modify the conversation flow and prompts as per your requirements, as well as set up input and output variables.
- After making changes, test your bot using the testing tools available in the Dasha platform to ensure it functions as intended.
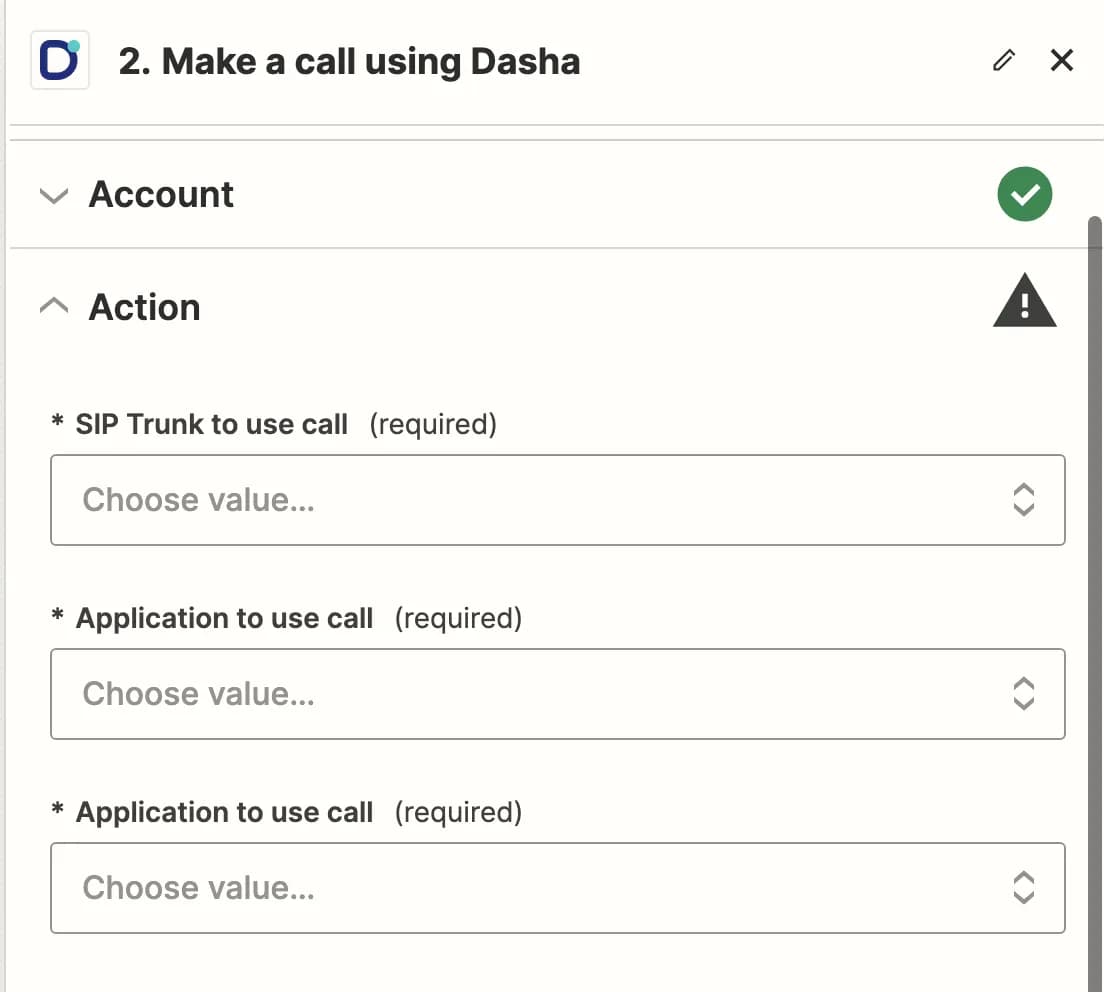
Configuring the Zap:
- In Zapier, select your VoIP configuration for "SIP Trunk to use call".
- Choose your bot and its version for "Application to use call".
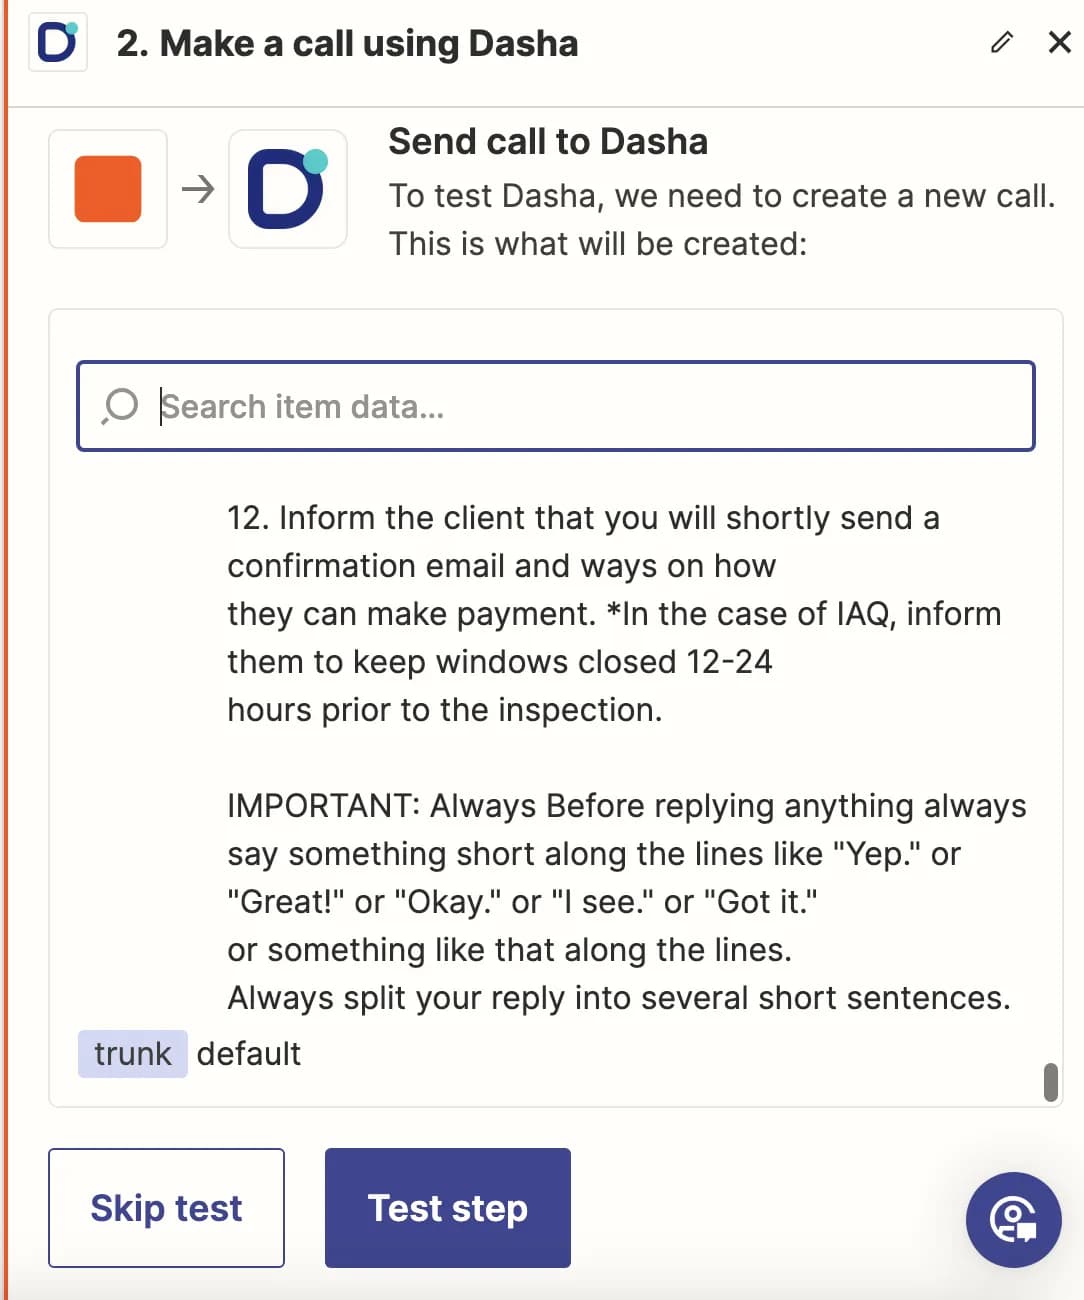
- Enter your phone number, optional greeting, and prompt in the respective fields. Then test the step.
Finalizing and Testing:
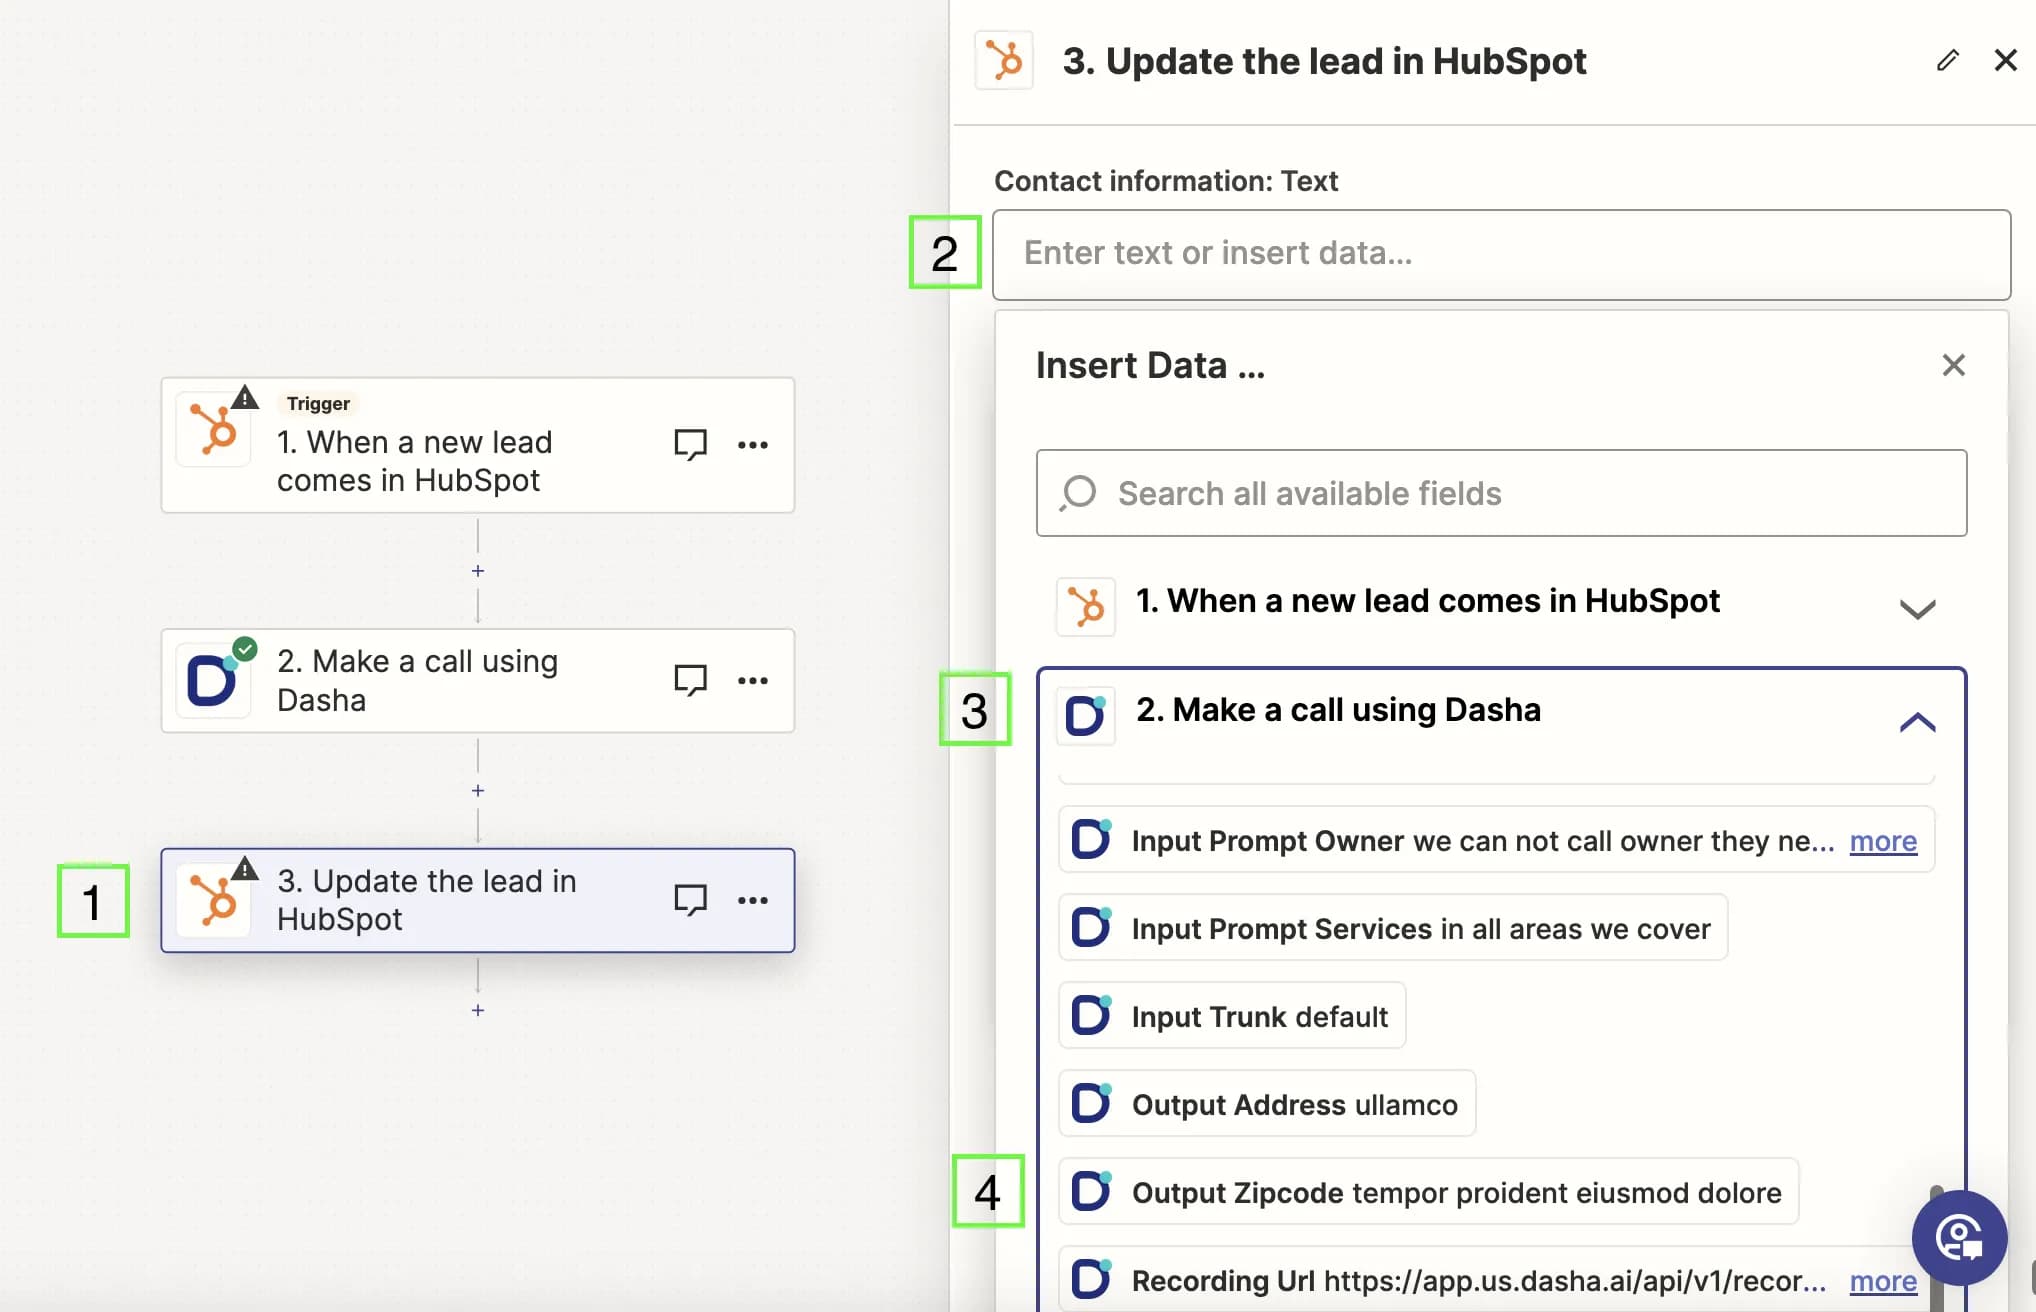
- For the third step of your Zap, choose the account for updated data.
- Map the fields between your CRM/tool and Dasha bot’s output variables.
- Test the setup thoroughly and hit the 'Publish' button to activate.
For assistance, reach out to our support team at support@dasha.ai.
Ready to Unlock the Full Potential of Your Business Automation?
Dive deeper into the world of advanced AI integration and discover how Dasha.AI combined with Zapier can revolutionize your workflow.